Progress of LibreServo
 Ficheros de producción
After more than a year without any update in LibreServo, it might seem that the project is at a standstill and/or abandoned. As I have said more than once, and I repeat myself, I will never leave LibreServo until it is completely finished, even if it takes me 5 more years.
What has happened in the last year?
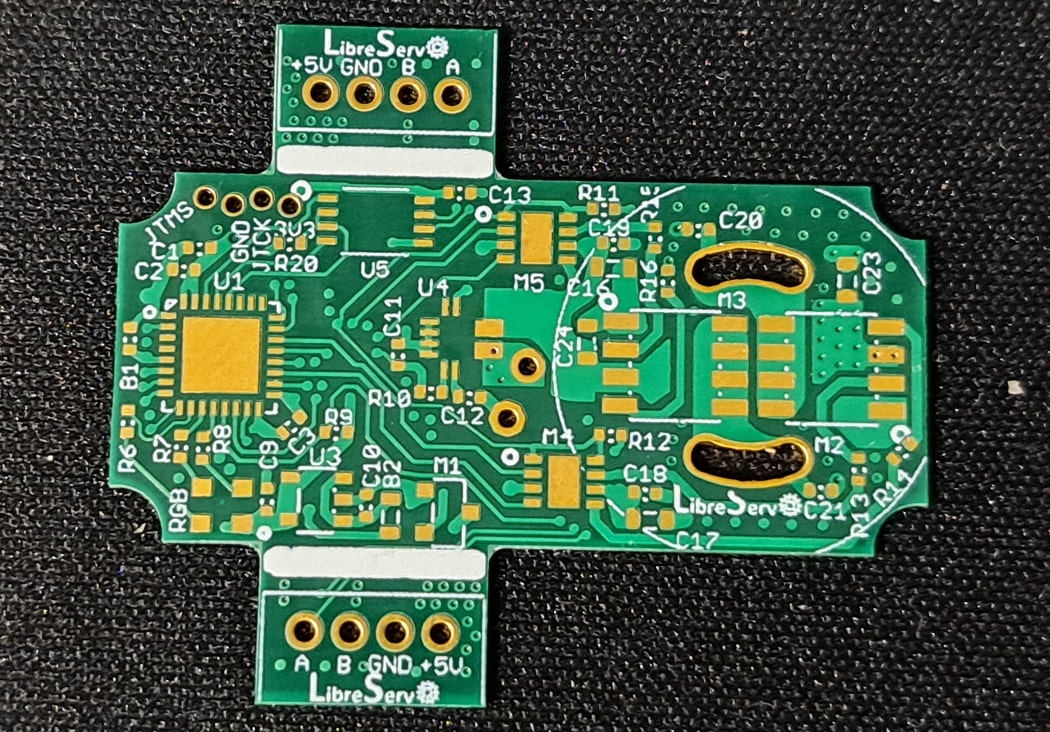
 LibreServo v2.3.1. Release Version

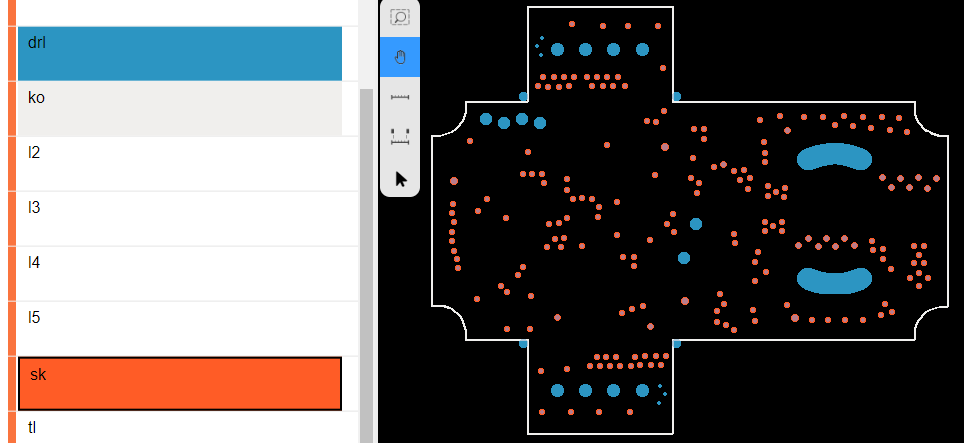 Production Files
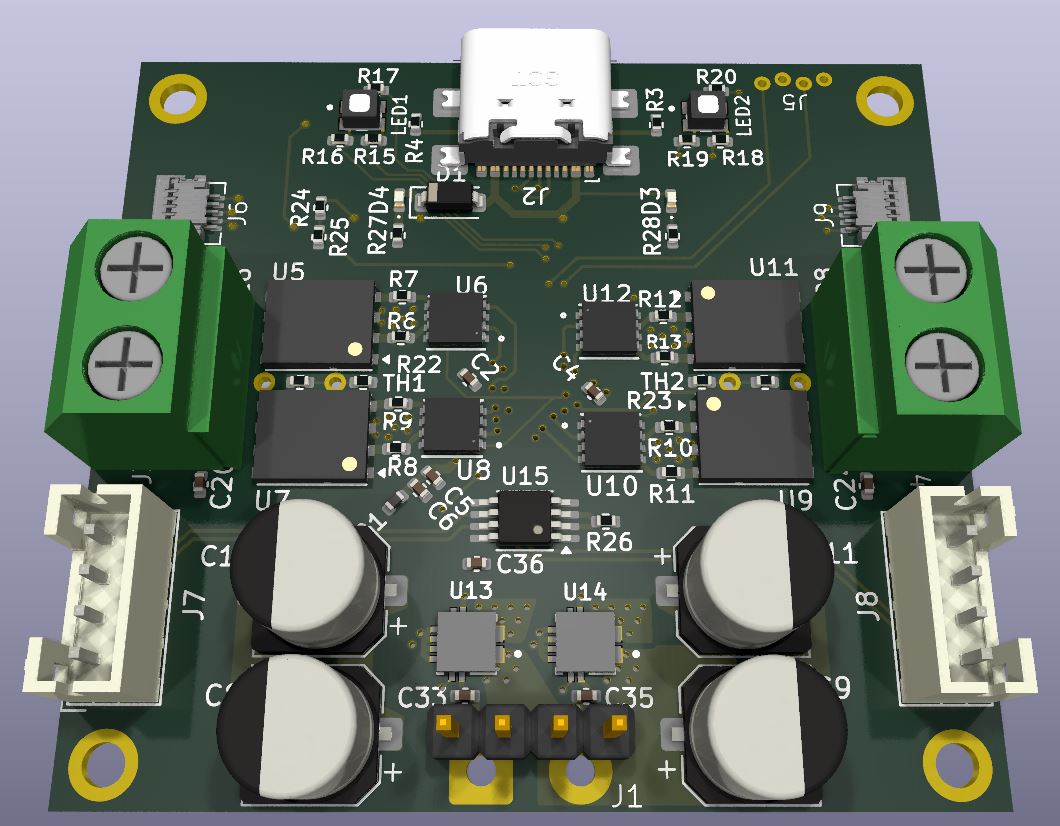
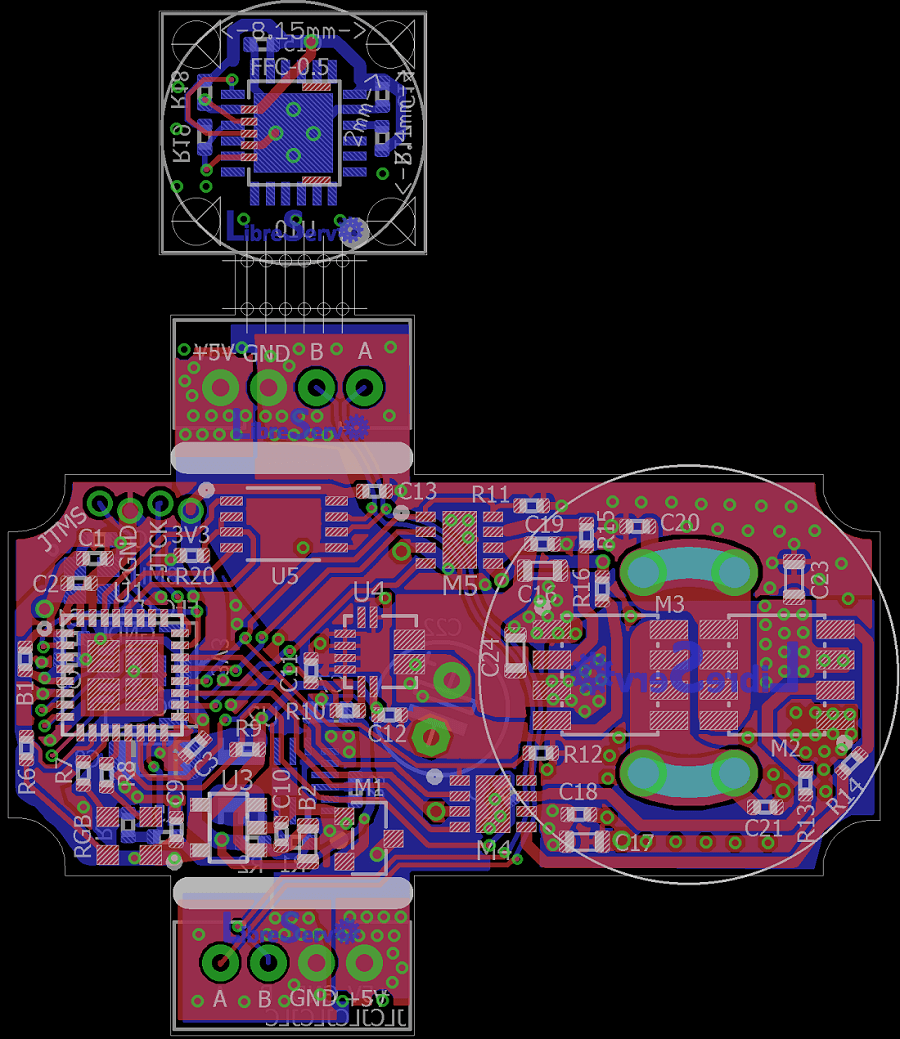
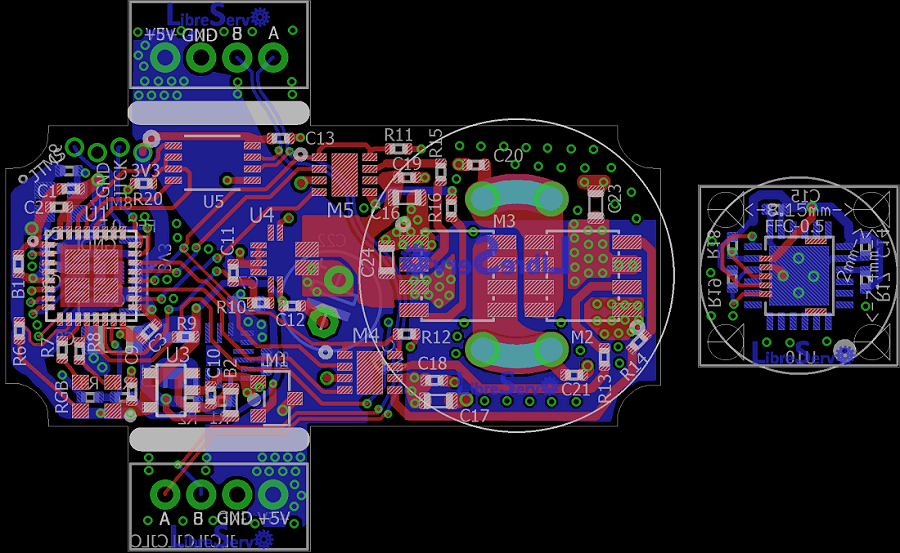
 LibreServo v2.3 PCB

 LibreServo v2.2 PCB
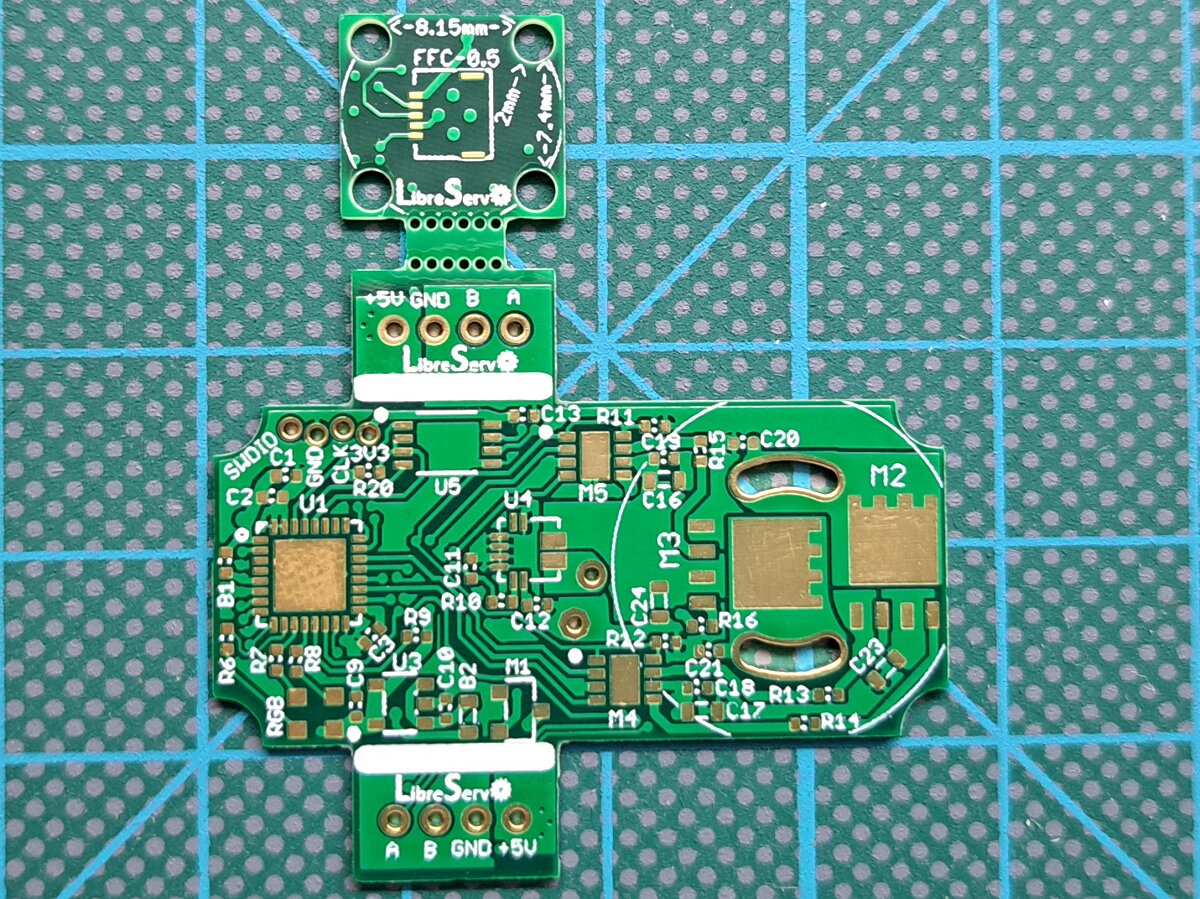
 New LibreServo v2.1
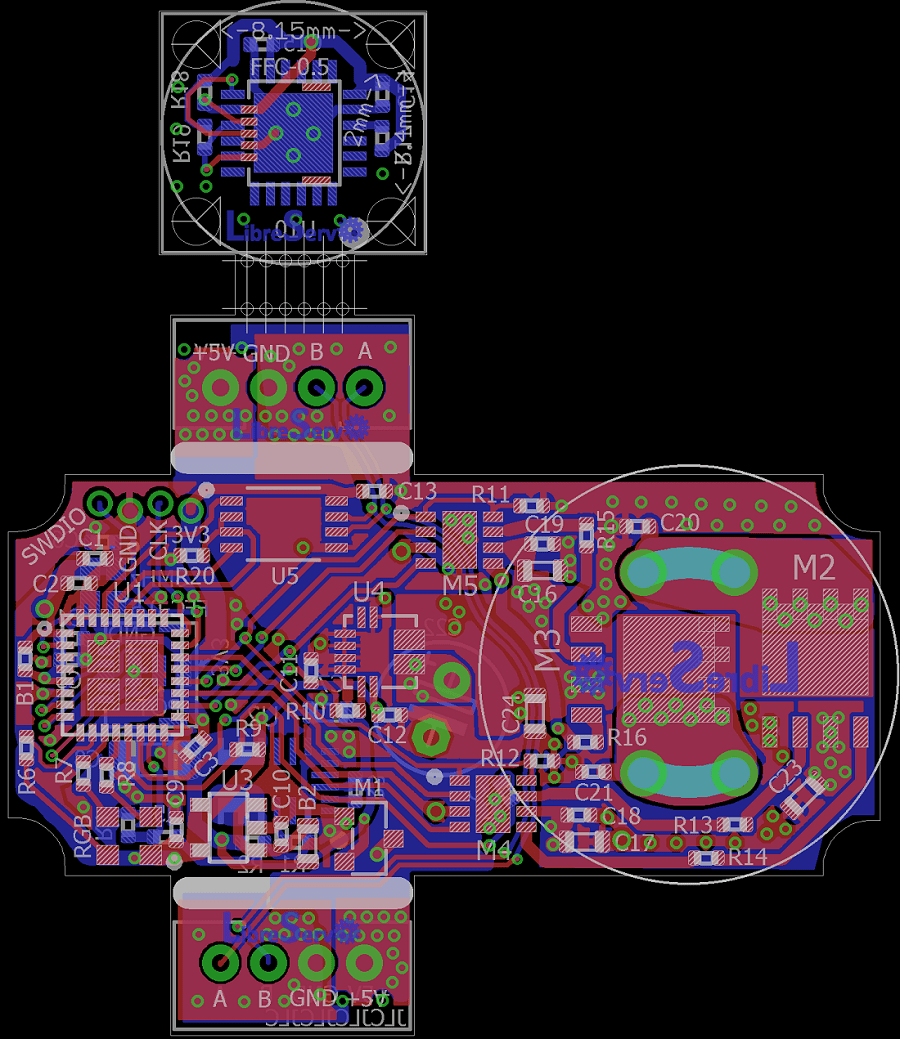
 LibreServo v2.1 PCB